

Cart
0

Table of Contents
- Step 1: Take Inventory and Declutter Your Medical Supplies
- Step 2: Sort and Group Similar Items Together
- Step 3: Pick the Best Medical Supply Storage Containers for Tight Spaces
- Step 4: Choose Storage Locations That Fit Apartment Life
- Step 5: Follow Safe Medication Storage Practices for Kids, Pets, and Visitors
- Step 6: Label Everything and Build a Simple Inventory System
- Step 7: Use an Emergency Medical Kit Checklist to Stay Prepared
- Frequently Asked Questions
Last Updated: October 6, 2026
Step 1: Take Inventory and Declutter Your Medical Supplies
Learning how to organize medical supplies in a small apartment starts with one honest question: what do you actually have? Most homes hold a mix of prescription medications, over-the-counter medicine, and first-aid supplies scattered across bathrooms, kitchen drawers, and closets.
So before you buy a single bin, empty every drawer, shelf, and bag onto a table. Then sort what you find into two piles: keep and toss.
Check Expiration Dates and Dispose of Expired Medications
Expired medications are the biggest hidden problem in any medicine cabinet. A common mistake is keeping old pills "just in case." In practice, expired drugs can lose strength or become unsafe (the FDA).
Check the date on every bottle, tube, and packet. Then:
- Toss anything past its printed expiration date
- Set aside unlabeled or mystery pills for disposal
- Check liquids for color changes or separation
- Replace anything you use daily before you need it
For safe disposal, the FDA guidance on drug disposal recommends mixing most medicines with dirt or used coffee grounds, sealing them in a bag, and putting them in household trash. Some communities also host drug take-back days, which are the safest option for prescription medications.
Step 2: Sort and Group Similar Items Together
Grouping similar items is the step that makes everything else work. When like items live together, you stop digging through a jumbled box at 2 a.m.
Start with three broad groups:
- Daily-use medications: prescriptions, vitamins, allergy pills
- Over-the-counter medicine: pain relievers, cold and flu remedies, antacids
- First-aid supplies: bandages, gauze, antiseptic wipes, gloves
Then go one level deeper. Split first-aid essentials into wound care, burn care, and tools like shears and tweezers.
Separate Daily-Use Medications from First-Aid Essentials
Daily medications belong where you take them, not buried in an emergency kit. Keep them in a small caddy or drawer near your kitchen or bathroom sink.
First-aid supplies are different. They need to be grab-and-go. We recommend keeping your first-aid kit fully separate from everyday meds so anyone in the apartment can find it fast.

This one change prevents the most common apartment problem: a visitor needs a bandage, and nobody knows which drawer to open.
Step 3: Pick the Best Medical Supply Storage Containers for Tight Spaces
The best medical supply storage containers for small apartments are clear, stackable, and sized to the exact shelf, drawer, or wall space you have.
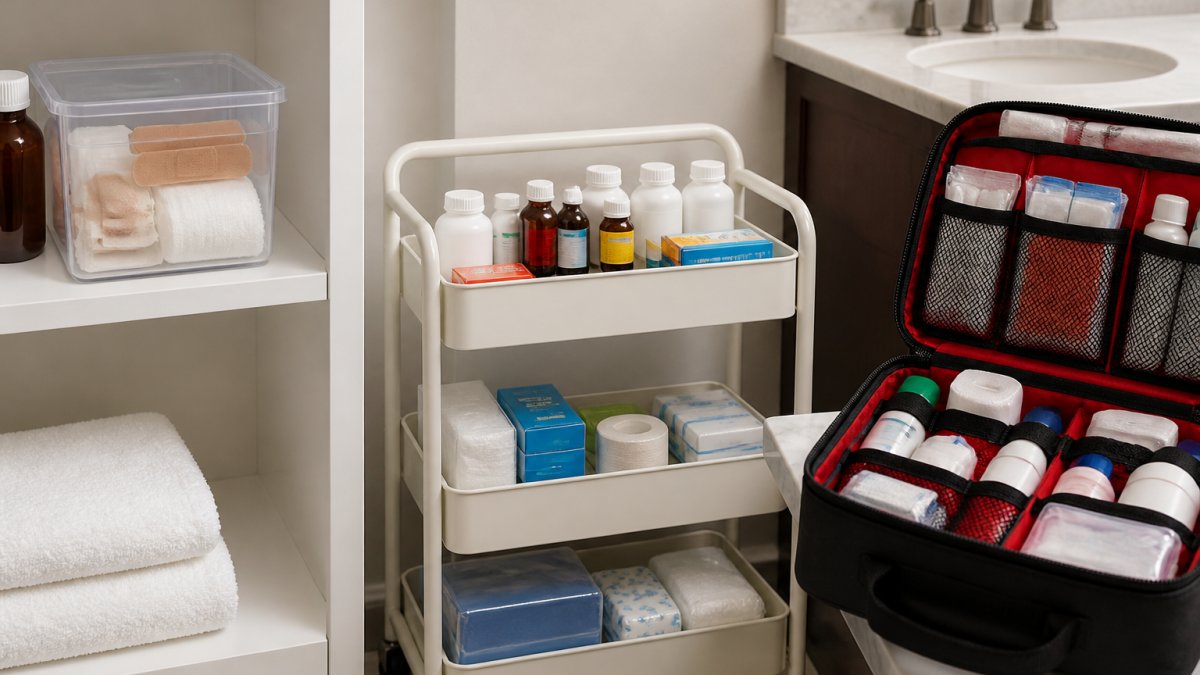
Before you buy anything, measure three things: shelf depth, drawer height, and the clearance for any door or cabinet that swings open. A bin that is one inch too deep will sit on your counter forever, and counter space is the first thing you lose in a small apartment.
Here is how we would choose containers by space, with apartment-specific trade-offs:
| Container Type | Best For | Where It Fits | Apartment Trade-Off |
|---|---|---|---|
| Rolling cart | Daily meds and OTC supplies | Beside a fridge or in a closet | Rolls out for access, rolls back to free floor space; choose a narrow 3-tier model under 12 inches wide |
| Clear stackable bins | First-aid essentials | Bathroom shelf or cabinet | Stack vertically to use dead space above the toilet; measure shelf depth first |
| Drawer dividers | Small items like wipes and gauze | Kitchen or bathroom drawer | Keeps shallow rental drawers usable; adjustable dividers fit odd widths |
| Turntable | Bottles and jars | Deep cabinet corners | Spins items forward so you stop digging; only works if the cabinet door clears the rim |
| Over-the-door pocket organizer | Gloves, masks, small tools | Inside a closet or pantry door | Uses vertical space without drilling; check that the door still closes |
| Compact kit bag | Emergency supplies | Under a bed or by the door | Soft-sided bags compress into gaps; keep one by the exit for grab-and-go |
A soft-shell case like our Soft Clamshell First Aid Kit Case fits a personal or medium kit and slides into tight spots. It has a mesh pocket and a clear divider to keep small tools in place.
For a lighter grab-and-go option, the Chinook UltraLight Pouch weighs under an ounce and is water-resistant. It works alone or as a supplement to a larger kit.

If you rent, avoid permanent mounting. Adhesive hooks, tension rods, and over-the-door racks remove cleanly at move-out. A tension rod across a closet or under a sink creates a hanging rail for small pouches without a single screw hole.
Pro Tip
Measure your shelf depth before buying any bin. A container that is one inch too deep will sit on your counter forever, and counter space is the first thing you lose in a small apartment.
Key Takeaway
Match the container to the space, not the other way around. Clear, stackable, renter-friendly options beat decorative boxes every time in a small apartment.
Step 4: Choose Storage Locations That Fit Apartment Life
Storage locations should match how you live, not how a magazine looks. A medicine cabinet is only one option, and often the worst one.
Think about your daily path. Where do you take medicine? Where do you head when someone gets a cut? Put supplies there.
Good spots in a small apartment:
- A rolling cart beside the fridge for daily meds
- A labeled bin on a high closet shelf for backup supplies
- A compact kit by the front door for emergencies
- A drawer divider in the bathroom for wound care
Keep Supplies Away from Heat, Moisture, and Humidity
Heat and damp conditions destroy medications and supplies. The bathroom cabinet above a shower is the worst place in the apartment for storage.
Soft Clamshell First Aid Kit Case →
Moisture breaks down pills and ruins sterile packaging. Heat does the same, only faster. So skip the windowsill and the space above the stove.
Store medications in a cool, dry, dark spot instead. A bedroom closet or a high kitchen cabinet works well. For storage conditions by product type, keep this in mind: liquids and ointments handle room temperature fine, but anything labeled "store below" needs a cooler spot.
Step 5: Follow Safe Medication Storage Practices for Kids, Pets, and Visitors
Safe medication storage practices protect the people and animals who share your space. In a small apartment, "out of reach" takes real planning.
Children and pets are curious, and visitors may not know your system. So build safety into where things live, not just how you talk about it.
- Use latched or child-resistant containers for any medication
- Keep all meds above counter height, ideally in a locked box
- Store pet and poultry medications separately from human ones
- Never leave pills in a purse, bag, or on a nightstand
- Tell visitors where the first-aid kit is, but keep meds out of sight
If you keep supplies for backyard poultry or pets, label them clearly. Mixing animal and human medications is a real risk, and clear labels stop it.
Step 6: Label Everything and Build a Simple Inventory System
Labels and a simple inventory system keep your setup working after the novelty wears off. Without them, supplies drift back into clutter within a few months. This is the step most organizing guides skip, and it is the one that decides whether your system survives a year in a small apartment.
Label every container by category, not by brand. "Wound care" beats "Band-Aids" because the contents will change over time. A label maker or masking tape and a marker both work fine.
Then track what you have. A simple system that fits on one index card or phone note:
- List each category and the items inside it
- Write the earliest expiration date for each item
- Note the quantity on hand
- Set a recurring reminder every six months to review
- Replace anything you used or that expired
- Reorder before you run out, not after
For a small apartment, keep the inventory digital so it does not add paper clutter. A notes app or spreadsheet works. Photograph the contents of each bin when you set it up, then update the photo after each check. The photo doubles as a shopping list when you are at the store.
A common pattern is to restock in two tiers: a small "working" supply in the kitchen or bathroom, and a sealed "backup" supply in a closet. When the working supply runs low, you refill from backup and add the item to your shopping list. This prevents overbuying and keeps expiration dates rotating.
Watch Out
The most common mistake is building a beautiful kit and never checking it again. Supplies expire quietly, and you only find out during an emergency. Set a phone reminder for every six months, and tie it to a date you already remember, like when you change smoke detector batteries.
RestockYourKit.com makes it easy to top up specific items instead of rebuying a whole kit.
Key Takeaway
A one-page inventory, a photo of each bin, and a six-month reminder are enough to keep a small-apartment medical supply system running without clutter or waste.
Step 7: Use an Emergency Medical Kit Checklist to Stay Prepared
An emergency medical kit checklist turns a pile of supplies into a plan. Keep one printed inside your kit so anyone can restock it correctly.
A basic apartment emergency kit should include:
- Adhesive bandages in several sizes
- Sterile gauze pads and rolled gauze
- Antiseptic wipes and triple-antibiotic ointment
- Nitrile gloves
- Tweezers and small shears
- A CPR mask
- Aspirin and sting relief swabs
- A space blanket
Our Everyday First Aid Kit covers most of this list in a 2.5-ounce package that fits in a car, a backpack, or a desk drawer. Pair it with the Traveler First Aid Bag if you want a translucent case that repels water and keeps dust out.

For apartment dwellers, we also suggest a small portable pouch that lives by the door. If you ever need to leave fast, you grab one bag instead of searching five drawers.
The American Red Cross first aid guidance offers free checklists and training that pair well with any home kit.
Small apartments punish clutter, and medical supplies are easy to neglect until you need them. The fix is a system: clear containers, smart locations, honest labels, and a six-month check. RestockYourKit.com makes that system easy to maintain with custom-built kits, individual supplies at near-wholesale prices, hard-to-find medications in smaller quantities, and free shipping on orders of $79 or more. Get started with RestockYourKit.com and build a kit that stays ready, no matter how tight your space.
Frequently Asked Questions
What is the best way to organize medical supplies in a small apartment?
Start by taking inventory and removing expired medications. Group similar items like bandages, ointments, and over-the-counter medicine together. Use clear bins, a rolling cart, or a soft clamshell case to keep everything contained. Store daily-use medications in an accessible spot away from heat and moisture, and keep first-aid supplies separate. Label each container clearly and check your inventory every six months so you always know what you have.
Where should I store medications if I don't have a medicine cabinet?
A high kitchen shelf, a locked drawer, or a closet shelf away from the stove and sink works well. Avoid bathrooms because humidity and heat can degrade medications. A rolling cart that fits beside a dresser or in a closet keeps supplies mobile and out of reach of children and pets. If you use bins, choose ones with lids to protect from dust and moisture. Just make sure the location stays cool, dry, and consistent.
How do I keep medical supplies safe from children and pets?
Store all medications in child-resistant containers inside a locked drawer, a latched bin, or a high shelf that pets cannot reach. Keep first-aid supplies in a separate labeled bag or box, and never leave loose pills or small items like gauze or gloves where pets can chew them. For visitors, mention where the first-aid kit is kept so they can find it quickly in an emergency without rummaging through personal items. A simple latch or cabinet lock costs a few dollars and prevents most accidents.
How often should I check expiration dates and restock my medical supplies?
Check expiration dates every six months, ideally when daylight saving time changes. Set a phone reminder or write the date on your storage bin. Replace expired medications and used items right away. Keep a small notepad or phone note listing what you have and what you need. An emergency medical kit checklist helps you track essentials like bandages, antiseptic wipes, and pain relievers. Restocking a few items at a time is easier than rebuilding a kit from scratch.


