

How to Conduct a Monthly Safety Supply Audit
Last Updated: November 6, 2026
Quick Summary
A safety supply audit is a scheduled monthly check of every kit, cabinet, and station where your team keeps medical and emergency gear. Walk each location with a checklist, verify every item is present, undamaged, in date, and usable, then log shortfalls and set reorder points. Assign one named owner per location so the audit actually happens.
- Monthly is the right audit rhythm for most workplaces, with one named owner per location.
- For every item, check four things: present, undamaged, in date, and usable.
- Reorder point = (average monthly usage × lead time in months) + safety stock.
- Track stockout rate and expired-item rate together, since a full kit can still be unusable.
- Every failed line needs a corrective action, an owner, a due date, and verification.
Table of Contents
- Step 1: Define the Scope of Your Monthly Safety Supply Audit
- Step 2: Build a Safety Audit Checklist for Each Supply Category
- Step 3: Inspect Expiration Dates, Damage, and Readiness
- Step 4: Record Findings and Set Reorder Points
- Step 5: Use a Safety Audit Checklist Excel Template to Track Trends
- Step 6: Close Out Corrective Actions and Verify Follow-Up
- A First Aid Kit Inspection Checklist You Can Reuse Every Month
- Adapt Your Monthly Safety Supply Audit Template to Any Kit
- Frequently Asked Questions
Step 1: Define the Scope of Your Monthly Safety Supply Audit
A safety supply audit is a scheduled check of every kit, cabinet, and station where your team keeps medical and emergency gear. Kits often get built once, then quietly decay.
The fix is a monthly safety supply audit. It takes less time than most people expect, and it catches the problems that matter before an emergency does.
List Every Kit and Supply Station
Start by writing down every place supplies live. Most organizations miss at least one.
- Vehicle kits and glove-box pouches
- Shop or break-room first aid cabinets
- Jobsite and crew kits
Walk the building with a clipboard and confirm each location. A kit nobody can find is a kit that fails.
Set Audit Frequency and Ownership
Monthly is the right rhythm for most workplaces. Assign one named owner per location, not a committee. The owner runs the check, signs the record, and flags anything short. A single name on the form is the difference between an audit that happens and one that gets postponed.
Step 2: Build a Safety Audit Checklist for Each Supply Category
A safety audit checklist is only useful if it matches what you actually stock. Generic forms waste time on items you never carry and skip the ones you do.
Build one checklist per category, then attach it to each station. Keep each list short enough to finish in one pass.
Supply-by-Supply Inspection Points
For every item, check four things: present, undamaged, in date, and usable. That covers most failures.
- Adhesive bandages: sealed, adhesive still tacky, sizes match the kit list
- Gauze and dressings: sterile pouches intact, no tears or water stains
- Medications: expiration date visible, packets unopened
Mark each line pass or fail. A quick note on any fail saves a second trip.
Step 3: Inspect Expiration Dates, Damage, and Readiness
Expiration and damage checks are where most audits earn their keep, but only if you apply consistent criteria. Pull every dated item and read the date.
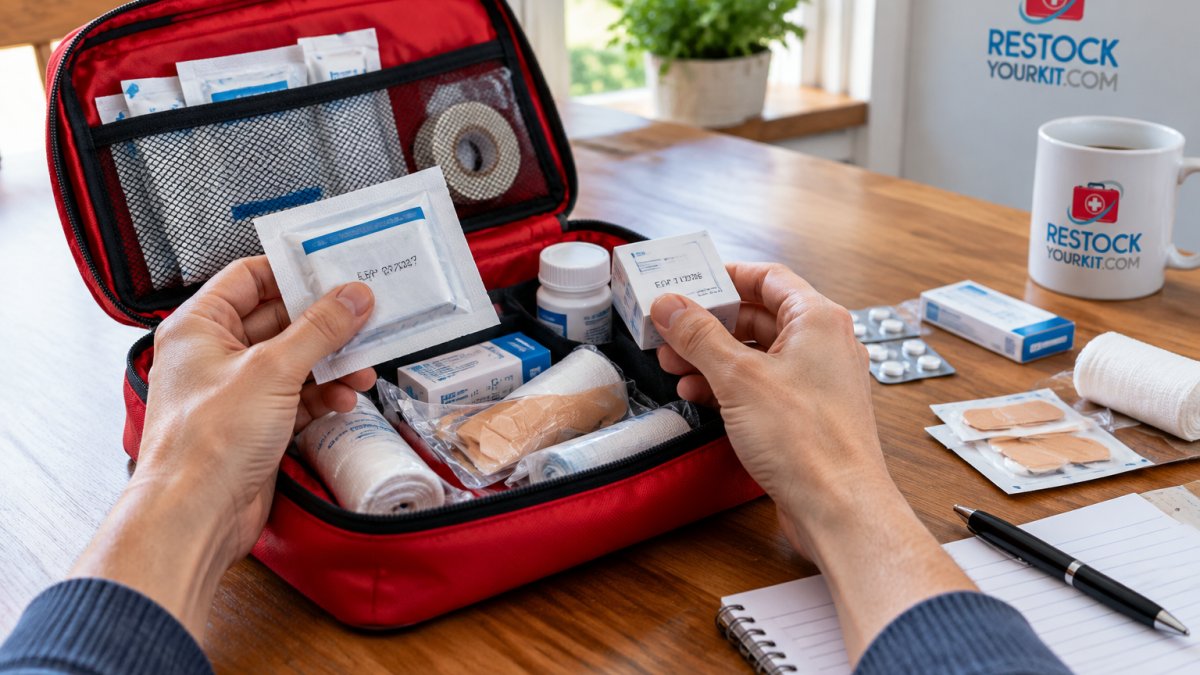
Expiration criteria by supply type
Not every item fails the same way. Use these criteria so two auditors reach the same pass/fail decision:
- Adhesive bandages and tape: adhesive still tacky, wrapper sealed, no yellowing of the pad. A bandage that has lost tack will not stay on a sweaty hand.
- Sterile gauze and dressings: pouch intact, no water stains, no pinholes. A compromised seal means the item is no longer sterile even if it looks clean.
- Medications (including over-the-counter): expiration date visible, packet or bottle unopened, no discoloration or crumbling. Never keep a medication whose label is illegible.
Damage and readiness checks
Damage hides in plain sight. Look for crushed boxes, split sterile seals, rust on scissors, and cloudy antiseptic. A cracked seal means the item is no longer sterile, even if it looks fine.
Readiness means the kit works as a whole, not just item by item. Ask three questions at every station:
- Can you open it fast? A kit jammed behind a locked cabinet or buried under stock is not ready.
- Is the contents list accurate? If the list says 24 bandages and the kit holds 14, the list is wrong and the next auditor will be misled.
- Are the most-used items within reach of the point of use? Gloves should be next to the gauze, not in a separate tote.
Multi-location and shared-kit checks
If you run more than one station, do not audit them from memory. Walk to each location with the checklist and mark the location code on every line. Shared kits (crew trucks, jobsite trailers, break rooms) fail more often than single-owner kits because no one feels responsible. For those, add a sign-out sheet inside the lid so the next auditor can see who last pulled stock.
Disposal of expired and damaged stock
Watch out: expired medications and opened sterile packs cannot go in the trash. Follow proper disposal rules for medical waste, and check our guide on how to safely dispose of expired medical supplies before you clear the shelf. For a deeper routine on rotating dated stock, see maintaining first aid kit expiration dates.
Record every fail with the item, quantity, location, and reason (expired, damaged, missing, unreadable). That record is what makes the next section, reorder points, work.
Step 4: Record Findings and Set Reorder Points
Recording findings turns a chore into a system. Log what you checked, what failed, and how many remain. That count drives your reorder points.
A reorder point is the stock level that triggers a purchase. Set it so new supplies arrive before you run out. The formula most practitioners use is:
Reorder point = (average monthly usage × lead time in months) + safety stock
If your crew uses about 10 bandages a month and your supplier takes two weeks to deliver, your lead time is roughly 0.5 months. With a safety stock of 4 bandages, the reorder point is (10 × 0.5) + 4 = 9. Round up to 10 so the trigger is easy to spot on the shelf. Once the reorder point is clear, apply the same habit of checking evidence before restocking sanitizer to verify safety claims.
Setting par levels and reorder points by supply
Par level is the maximum you want on hand after a restock. Reorder point is the trigger. Keep both on the checklist so the auditor does not have to guess.
| Supply | Par Level | Reorder Point | Typical Restock Cadence |
|---|---|---|---|
| Adhesive bandages | 24 | 10 | Monthly |
| Gauze pads, 4x4 | 10 | 4 | Monthly |
| Exam gloves | 20 | 8 | Monthly |
| Antiseptic wipes | 20 | 6 | Quarterly |
| Medications | 10 | 4 | Quarterly |
| Cold packs | 6 | 2 | Quarterly |
| Spill absorbent pads | 12 | 4 | Quarterly |
Reorder Point
Treat these as starting points, not fixed law. After two or three months, replace the assumed usage with your actual usage from the audit log. If bandages run short every month, your par level is too low.
Stock levels and purchasing workflow
Keep the workflow simple and repeatable:
- Audit owner logs the shortfall on the checklist with item, quantity needed, and location.
- Manager approves the shortfall list, usually a single sign-off per site per month.
- One person places the order against the approved list, using the same supplier and the same item numbers each month.
- Receiving check confirms the order matches the shortfall list before stock goes back on the shelf.
- Close the loop by marking the audit line resolved and dating it.
Bulk ordering once a month beats a dozen panicked purchases. Our guide on restocking medical kits for small businesses walks through the purchasing steps. When you are ready to buy, the best individual first aid kit refills covers what to order for common setups.
Metrics to track month over month
A monthly supply audit is only as good as the trend it produces. Track these measures in the same spreadsheet as the checklist:
- Stockout rate: number of items at zero on hand divided by total items checked.
- Expired-item rate: number of expired items removed divided by total items checked.
- Audit completion: stations audited on schedule divided by stations assigned.
Watch out: a low stockout rate can hide a high expired-item rate, a kit can look full and still be unusable. Review both numbers together before you conclude a station is healthy.
Turning findings into next month's plan
Before you close the audit, write three lines at the bottom of the form: what failed most, what is likely to fail next month, and what you will change (par level, supplier, storage location, or owner). Carry those three lines into the next month's audit so the process improves instead of repeating.
Step 5: Use a Safety Audit Checklist Excel Template to Track Trends
A spreadsheet turns monthly notes into a trend line. Build a safety audit checklist Excel template with one tab per month and one row per supply.
Columns to include:
- Location and date
- Item name and category
- Count on hand
After a few months, patterns show up. If bandages run short every month, your par level is too low. If one station keeps failing, that owner needs help. Trend tracking is how a monthly safety supply audit gets smarter over time.
Step 6: Close Out Corrective Actions and Verify Follow-Up
A deficiency is only fixed when someone confirms it. Every failed line gets a corrective action, an action owner, and a due date. Then it gets verified.
Close-out steps:
- Log the deficiency and the fix needed
- Assign one owner and a deadline
- Complete the fix and note the date
- Verify with a second check, photo, or signature
Verification is the step most teams skip. Without it, a reorder gets marked done that never shipped. Build follow-up into the next month's audit so nothing slips.
A First Aid Kit Inspection Checklist You Can Reuse Every Month
Here is a repeatable first aid kit inspection checklist. Print it, tape it inside the kit lid, and work down the list each month.
- Kit is present, closed, and easy to reach
- Contents list matches what is inside
- All bandages sealed and in date
This checklist covers the core of any monthly safety supply audit. Adapt the item names to your own kit and it works for home, vehicle, crew, or jobsite.
Adapt Your Monthly Safety Supply Audit Template to Any Kit
The same template flexes across every kit type with small changes. Swap the item list, keep the process.
- Home and vehicle kits: add seasonal items like cold-weather gear
- Crew and jobsite kits: add PPE and spill-response checks
- Animal and poultry kits: add medication and feed-adjacent supply checks
For workplace and farm kits, compliance adds a layer. Our guide on maintaining an OSHA-compliant farm first aid kit covers the requirements that apply to those setups.
One honest note: no two kits are identical, so your template will always need a little tuning. Start with the checklist above and adjust as you learn what your stations actually use.
Running a monthly safety supply audit is not glamorous work. It is the difference between a kit that works and one that only looks ready.
RestockYourKit.com builds custom first aid kits and sells individual medical supplies, so you can refill what you actually use instead of replacing whole kits. Start with a Band-Aid assortment refill, gauze refill pack, or the Super Basics medication refill to help keep your shelves stocked.


Frequently Asked Questions
How long does a monthly safety supply audit take?
A single household or vehicle kit usually takes 10 to 15 minutes once you have a checklist in place. Larger setups, such as a crew kit or a Scout troop's wilderness kit, take 30 to 45 minutes because there are more items and more expiration dates to verify. The first audit always runs longer since you are building the inventory list as you go. After that, the safety supply audit becomes a quick recurring task you can schedule on the same day each month.
How often should first aid and emergency supplies be checked?
Check supplies monthly and do a deeper review every quarter. The monthly pass covers stock levels, expiration dates, damaged packaging, and whether tamper seals are intact. The quarterly review adds a full inventory count, a check that medications are still within their labeled shelf life, and a look at whether your kit still matches how you actually use it. High-use kits, such as a family car kit or a crew kit, benefit from the monthly check most because items disappear quietly between outings.
What should I do with expired or damaged first aid supplies?
Pull them out of the kit immediately and set them aside so they cannot be used by mistake. Damaged packaging, torn gauze wrappers, or cracked bottles should be discarded even if the expiration date has not passed, because sterility and dosing can no longer be trusted. Expired medications go to a pharmacy take-back program or a household hazardous waste site rather than the trash. Then log the removal on your safety audit checklist so the reorder step captures what needs replacing.
What is the difference between a safety audit and a safety inspection?
An inspection is the hands-on check of physical items: opening the kit, counting supplies, reading expiration dates, and confirming nothing is damaged. An audit is the wider review that includes the inspection plus records, reorder decisions, corrective actions, and follow-up. In practice, a monthly safety supply audit uses an inspection as its core step, then adds documentation and a plan for restocking. Keeping both parts separate in your checklist makes it clear what was observed versus what was decided.
