

Professional Medical Gear for Backyard Enthusiasts
Table of Contents
- Why Backyard Enthusiasts Need Professional Medical Gear
- How to Treat Backyard Chicken Wounds
- Poultry First Aid Kit Checklist
- Best Antiseptic for Chicken Wounds
- Essential Medical Gear for Backyard Enthusiasts: Comparison Table
- Weight vs. Capability: Finding the Right Balance
- Maintenance and Shelf-Life Tracking for Your Medical Gear
- Frequently Asked Questions
Last Updated: September 12, 2026
Why Backyard Enthusiasts Need Professional Medical Gear
Backyard chickens get hurt in ways that generic first aid kits handle poorly. A hawk strike, a dog bite, or a fence laceration produces a deep, contaminated wound that needs real supplies, not a travel-sized bandage. This guide from RestockYourKit.com covers the professional medical gear backyard enthusiasts actually need, from trauma dressings to poultry-specific antiseptics.

The gap most keepers discover too late is specificity. Human first aid kits lack the dilute antiseptics, hemostatic agents, and wound-flush tools that work on a chicken's anatomy and physiology. Professional medical gear closes that gap with field-ready supplies chosen for animals that weigh a few pounds and bleed fast. Equipping your kit with professional tactical gear ensures that you are prepared to stabilize these small patients before a crisis escalates beyond your control.
Below, we'll show you exactly how to treat backyard chicken wounds, what belongs in a poultry first aid kit checklist, and which antiseptic actually belongs on a hen's skin. But first, here's what most guides get wrong: they treat backyard care as a hobby, when it is really emergency preparedness practiced at home.
How to Treat Backyard Chicken Wounds
The best way to treat backyard chicken wounds is to flush, clean, and dress the wound within the first hour, then monitor for infection daily. Chickens hide pain well, so a wound you notice is often hours old already.
Work through these steps in order:
- Isolate the bird in a quiet, dim crate lined with clean towels.
- Flush the wound with sterile saline or a wound-flush solution to remove dirt and debris.
- Clean surrounding feathers with dilute antiseptic, never full-strength.
- Apply pressure with gauze if the wound is bleeding, then cover with a non-stick dressing.
- Keep the bird warm and watch for shock, which is the real danger in small birds.
According to the Merck Veterinary Manual, prompt wound cleaning and protection from fly strike matter more than any single product. Fly strike kills more wounded backyard birds than the original injury.
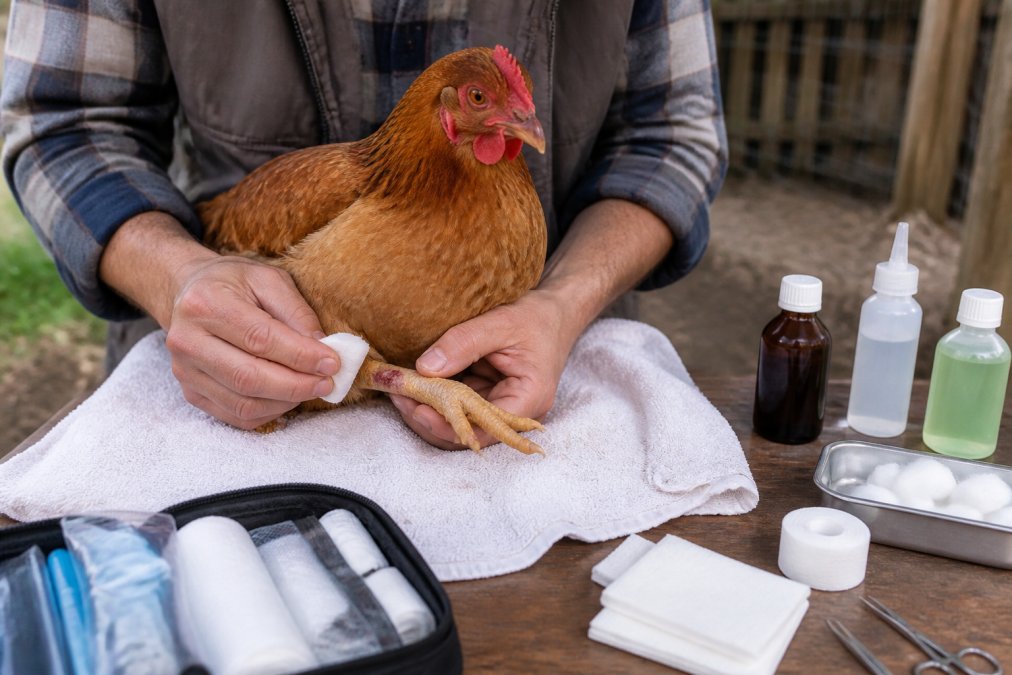
Step-by-Step Wound Care for Backyard Poultry
Start by washing your own hands, then assemble everything before you touch the bird. A stressed chicken flaps and reopens wounds, so prep matters.
- Saline or wound-flush syringe for irrigation
- Sterile gauze pads and non-stick dressings
- Dilute chlorhexidine or povidone-iodine for cleaning
- Hemostatic agent for bleeding that won't stop
- Vet wrap or self-adherent bandage for securing dressings
Poultry First Aid Kit Checklist
A complete poultry first aid kit checklist covers four categories: wound care, bleeding control, infection prevention, and handling tools. Build around those categories and you will not miss anything critical.

| Category | Essential Items | Purpose |
|---|---|---|
| Wound care | Saline, gauze, non-stick dressings | Flush and cover injuries |
| Bleeding control | Hemostatic agent, pressure dressings | Stop serious bleeding |
| Infection prevention | Dilute antiseptic, disposable gloves | Prevent wound infection |
| Handling tools | Towels, crate, blunt scissors | Restrain and isolate safely |
Store the kit in a waterproof casing so it stays field-ready in a barn or coop. RestockYourKit.com offers individual refills so you replace what you use instead of rebuying the whole kit.
Best Antiseptic for Chicken Wounds
The best antiseptic for chicken wounds is dilute chlorhexidine or povidone-iodine, both used at a strength safe for delicate skin. Full-strength products burn tissue and delay healing.
Dilute chlorhexidine solution is the workhorse choice for most keepers. It has broad activity against bacteria and stays effective in the presence of organic matter, which matters when you are cleaning a wound in a coop. Povidone-iodine is a solid alternative for one-time cleaning, though it stains feathers and should be diluted before use.
What most guides miss is that the delivery method matters as much as the chemical. A syringe for irrigation reaches deep into a puncture wound that a soaked cotton ball never touches. Pair the antiseptic with a flush tool and the cleaning gets dramatically more effective.
Essential Medical Gear for Backyard Enthusiasts: Comparison Table
Most gear guides compare kits by size, ultralight, day, comprehensive, which is the wrong axis for a backyard enthusiast. The right axis is the injury mechanism you are most likely to face. A chainsaw laceration, a bee sting cluster, and a predator bite on a hen each demand different supplies, and no single off-the-shelf kit covers all three well.
Start by mapping your actual backyard risks. The table below pairs each common mechanism with the gear that addresses it, so you can build a kit around your property instead of around a marketing category.
| Backyard Risk | Typical Mechanism | Gear That Matters | Why Generic Kits Fall Short |
|---|---|---|---|
| Power tool injury | Chainsaw, splitter, string trimmer laceration | Tourniquet, hemostatic gauze, trauma shears, heavy nitrile gloves | Most kits ship with only adhesive bandages and a small gauze roll |
| Mower or blade trauma | Projectile, blade contact, crush | Trauma dressing, irrigation syringe, saline, non-stick dressing | No irrigation or packing supplies in a standard kit |
| Gardening laceration | Pruning shears, thorn puncture, hoe or spade cut | Irrigation syringe, dilute chlorhexidine, tweezers, magnifier | No wound-flush tool; tweezers are usually too small for thorns |
| Insect sting or bite | Bee, wasp, hornet, spider, tick | Epinephrine auto-injector if prescribed, antihistamine, sting scraper, tick key | Kits rarely include epinephrine storage guidance or tick tools |
| Animal bite | Dog, raccoon, fox, predator on poultry | Irrigation, hemostatic gauze, bite-report card, gloves | No bite-specific documentation or deep-wound supplies |
| Poultry wound | Hawk strike, dog bite, fence laceration | Poultry module: dilute antiseptic, vet wrap, non-stick dressing | Human kits lack dilute antiseptics and small-animal dressings |
| Chemical splash | Fertilizer, herbicide, pool chemical | Eye flush, sterile saline, nitrile gloves, safety glasses | Almost never included in first aid kits |
| Burn | Grill, fire pit, hot equipment | Burn gel, non-adherent burn dressing, cling film | Standard kits carry one small burn gel packet |
Two patterns stand out. First, the same three items, a tourniquet, a hemostatic gauze, and an irrigation syringe, appear across nearly every serious backyard mechanism. If you buy nothing else, buy those three and learn to use them. Second, the gear that separates a backyard kit from a hiking kit is irrigation and dilution, not trauma. Backyard wounds are dirty wounds: soil, plant matter, animal saliva, and metal fragments. Flushing them thoroughly in the first hour matters more than any single dressing.

This is also where the backyard kit should plug into your home emergency plan rather than replace it. Your household kit likely already covers kitchen burns, cuts, and medications. The backyard kit should supplement it with the trauma and irrigation supplies a home kit lacks, and both should share a restock schedule so you are not buying duplicate items. A simple approach: keep the home kit as the medical hub, keep a belt kit on your person during yard work, and keep a shop or coop kit stocked with the backyard-specific modules. When a serious injury happens, the home kit is the resupply point, not the first responder.
For the human-side overlap, CPR, bleeding control, and burn care, the American Red Cross first aid guidance is a reliable reference, and pairing it with a hands-on Stop the Bleed course is the fastest way to make the gear above actually usable under stress. For animal-side supplies, the Merck Veterinary Manual remains the standard reference for wound cleaning and fly-strike prevention.
RestockYourKit.com offers individual refills so you replace the tourniquet, the irrigation syringe, or the poultry module on its own schedule rather than rebuying the whole kit.
Weight vs. Capability: Finding the Right Balance
Weight and capability pull against each other, but for a backyard enthusiast the trade-off is not about ounces on a thru-hike. It is about how fast you can reach the kit, how much blood loss you can control before EMS arrives, and whether the kit survives a season in an unheated shed. Reframe the question: not "how light can I go" but "how much capability can I keep within arm's reach of where injuries actually happen."
Use three placement tiers, each with its own weight budget and capability ceiling.
Tier 1, Belt or apron kit (under 1 lb). This is what you wear while running a chainsaw, string trimmer, or splitter. It carries a tourniquet, a compressed hemostatic gauze, a pair of nitrile gloves, and a trauma shears. Nothing else. The point is that a power-tool injury in the yard can produce arterial bleeding in seconds, and the tourniquet needs to be on your body, not 40 yards away in the garage. A belt kit that weighs 12 ounces and lives on your hip beats a 15-pound kit on a shelf every time.
Tier 2, Coop or shop kit (5-15 lbs). This is the stationary kit that handles the messy, non-arterial stuff: irrigation, wound packing, burn dressings, sting treatment, and poultry-specific supplies. Weight is nearly irrelevant here because the kit does not travel. Spend the budget on capability, a full antiseptic range, multiple dressing sizes, a bulb syringe or 60 mL irrigation syringe, and a dedicated poultry module.
Tier 3, Vehicle or go-bag kit (10-20 lbs). This is the bridge kit. It lives in the truck or the mudroom and covers the gap between the belt kit and the shop kit. It should duplicate the tourniquet and hemostatic gauze (so you are never caught without one), plus splinting, a space blanket, and a broader medication set.
The practical rule for backyard work: match the kit to the worst realistic mechanism, not the worst imaginable scenario. The realistic mechanisms are a chainsaw or mower laceration, a pruning-shear puncture, a ladder fall, a dog or predator bite, a bee or wasp sting cluster, and a chemical splash from fertilizer or herbicide. None of those require a multi-day evacuation kit. All of them require that the right tool is within 30 seconds of the injury.
A common pattern among experienced keepers and home woodworkers is to over-invest in the stationary kit and under-invest in the belt kit. That is backwards. The stationary kit is where you treat; the belt kit is where you survive the first three minutes. Build the belt kit first, then the shop kit, then the vehicle kit.
One more weight consideration that outdoor guides ignore: heat and cold. A kit that lives in a shed through a Midwestern summer or a Northern winter will see adhesive fail, sterile packaging crack, and liquids separate. Rotate the belt kit indoors between uses, and inspect the shop kit's packaging every season for brittleness.
Maintenance and Shelf-Life Tracking for Your Medical Gear
Medical gear expires, and expired supplies fail exactly when you need them. Track shelf life the way you track feed inventory: with a schedule and a written log.
Most antiseptics, sterile dressings, and medications carry expiration dates. Check your kit every season, rotate older stock to the front, and replace anything past its date. A simple index card taped inside the kit lid, listing each item and its expiration month, turns a forgotten kit into a maintained one.
This is where modular systems earn their keep. When your kit is built from refillable modules, you replace one expired module instead of rebuilding the whole kit. RestockYourKit.com structures its kits this way, and the CDC guidance on emergency supply kits recommends the same rotate-and-replace discipline for household preparedness.
Frequently Asked Questions
What medical supplies should be in a backyard chicken first aid kit?
A poultry first aid kit checklist should include sterile gauze pads, self-adhesive wrap, vet wrap, blunt-tipped scissors, tweezers, antiseptic wipes, saline solution, a digital thermometer, disposable gloves, and a small bottle of poultry-safe antiseptic. Add styptic powder for broken blood feathers and a heat source for shock. RestockYourKit.com offers these items in individual quantities, so you do not overbuy. Keep the kit in a waterproof casing and check expiration dates every six months.
How do you treat a deep wound on a chicken?
For a deep wound, first isolate the bird in a quiet, warm area. Flush the wound with saline or clean water to remove debris. Apply pressure with sterile gauze if bleeding is active. Use a poultry-safe antiseptic like diluted chlorhexidine or povidone-iodine. Do not use hydrogen peroxide, which damages tissue. If the wound is larger than a quarter inch or exposes muscle, contact a veterinarian. Keep the bird separated until healed and change bandages daily. Watch for signs of infection like swelling or discharge.
Can you use human medical gear on backyard poultry?
Some human medical gear works for poultry, but not all. Sterile gauze, self-adhesive wrap, saline, and gloves are safe. Avoid human antibiotics without veterinary guidance because dosing is wrong and residues can enter eggs. Human pain relievers like ibuprofen are toxic to birds. For wound care, stick to poultry-specific antiseptics or chlorhexidine. RestockYourKit.com carries specialized poultry and backyard chicken first aid supplies, including vet wrap and sterile supplies.
How do you sanitize a wound on a chicken safely?
Sanitize a chicken wound by flushing with sterile saline or lukewarm water first. Then apply a diluted antiseptic solution, such as chlorhexidine at 0.05% or povidone-iodine, using a clean gauze pad. Never use alcohol or hydrogen peroxide because they damage healthy tissue and slow healing. Pat the area dry with sterile gauze. Apply a thin layer of poultry-safe antibiotic ointment if needed, then cover with a non-stick pad and vet wrap. Clean the wound twice daily until it scabs over.
Backyard emergencies do not wait for a supply run, and a kit missing one critical item is a kit that fails. RestockYourKit.com builds custom first aid kits with poultry-specific supplies, hard-to-find medications in small quantities, and flexible refills so your gear stays current. Get started with RestockYourKit.com and keep every coop, car, and trail kit ready before you need it.