

Individual First Aid Supplies for Cars: What to Pack
Table of Contents
- Why Your Car Needs Dedicated First Aid Supplies
- Car Emergency Medical Kit Checklist: The Essentials
- Basic Car + Home First Aid Kit: A Ready-Made Option
- First Aid Kit Expiration Dates: What You Need to Know
- How to Organize a Car First Aid Kit for Quick Access
- Integrating Your Kit with Roadside Safety Gear
- Legal Liability and Training for Rendering Aid
- Your Next Step: Build or Upgrade Your Car Kit
- Frequently Asked Questions
Last Updated: September 6, 2026
Why Your Car Needs Dedicated First Aid Supplies
Most drivers keep a spare tire and jumper cables in the trunk but give little thought to medical emergencies. A roadside crash, a cut from broken glass, or a sudden allergic reaction can happen miles from the nearest help. A dedicated car kit matters because temperatures inside a parked car swing dramatically between seasons, degrading adhesives, liquids, and packaging faster than indoor storage.
Below, we walk through what to pack, how to organize it for seconds-counting access, and how to integrate your medical gear with the roadside safety equipment you already carry.
Car Emergency Medical Kit Checklist: The Essentials
Building a car emergency medical kit checklist starts with separating everyday boo-boos from genuine trauma response. The average driver needs a layered approach: wound care basics plus trauma add-ons for rare but serious events.
Wound Care Basics: Quantities and Rationale
The foundation of any vehicle kit covers cuts, scrapes, and minor burns. Stock enough to treat multiple people. Below is a vehicle-tested baseline for a family of four:
- Adhesive bandages (25-30 assorted): Include a mix of standard strips, knuckle, and fingertip shapes. The most common car injuries are friction burns from seatbelt release, glass cuts, and scrapes from changing a tire.
- Sterile gauze pads (4 × 4 inches, 10-pack minimum): These are your primary dressing for anything larger than a bandage. Choose individually wrapped pads to maintain sterility in a dirty trunk.
- Medical tape (1-inch, one roll): Standard paper tape fails in humidity. Choose a cloth or silicone-based tape that adheres to skin even when damp.
- Antiseptic towelettes (10-15 individually wrapped): Povidone-iodine or chlorhexidine wipes are more durable in heat than alcohol wipes, which evaporate quickly.
- Antibiotic ointment (one 1-oz tube): Choose single-use foil packets over a shared tube, a tube that sits in a glovebox for a year is a bacterial breeding ground once opened.
- First responder gloves (4-6 pairs, nitrile): Latex degrades in heat and can cause allergic reactions. Nitrile is the standard for vehicle kits.
- Trauma shears (one pair): A 7.5-inch stainless steel pair cuts through denim, seatbelt webbing, and thick tape. Avoid cheap plastic scissors that snap under pressure.
- Splinting material (one 36-inch SAM splint or equivalent): A rolled aluminum splint is lightweight, moldable, and works for wrist, ankle, or finger injuries. It also doubles as a makeshift arm board.
- Instant cold pack (one, 4 × 6 inches): Choose a single-use chemical pack, it has a 2-year shelf life and does not require refrigeration.
Trauma Response Add-Ons: Specifics and Selection Criteria
For events beyond a scrape, you need gear designed for life-threatening bleeding. A tourniquet and hemostatic gauze are compact enough to store under a seat.
- Tourniquet (one, windlass-style): The two dominant designs are the Combat Application Tourniquet (CAT) and the SOFT-T. The CAT is lighter and more common; the SOFT-T is more durable. Either is acceptable, the critical factor is that it is a true windlass device, not an elastic strap or belt. Avoid cheap imitations lacking a windlass rod and locking mechanism.
- Hemostatic gauze (one 3-inch × 3-yard roll): The active ingredient is either kaolin (QuikClot) or chitosan (Celox). Kaolin-based gauze is more widely available; chitosan-based gauze works in colder environments. Choose one type and learn its specific packing instructions.
- Pressure dressing (one 4-inch Israeli bandage or equivalent): This combines a sterile pad with an elastic bandage and a pressure bar. It is used when direct pressure fails but the wound is not amenable to a tourniquet (e.g., junctional areas like the groin or armpit).
- Compact emergency blanket (one, mylar): A 52 × 84-inch sheet reflects body heat and is critical for shock management. Mylar is the only material that survives being folded in a car for years without degrading.
The Vehicle-Specific Additions Most Guides Miss
Beyond the standard medical list, a car kit needs three items that address the vehicle environment specifically:
- A small bottle of sterile saline (100 mL): For flushing debris from eyes or wounds. Tap water is not sterile, and bottled water in a car grows bacteria in warm weather.
- A roll of duct tape (one, 2-inch): This is not a medical supply, but it is the most versatile tool in a car kit. It secures dressings, splints, and even temporary window covers.
- A permanent marker (one): For writing the time a tourniquet was applied. This information is critical for emergency responders.
What to Leave Out
A car kit is not a home kit. Leave out items that are bulky, temperature-sensitive, or rarely used in a roadside context:
- Liquid medications: Syrups and suspensions degrade in heat.
- Ointments in large tubs: They melt and contaminate.
- A full bottle of acetaminophen or ibuprofen: Tablets survive heat, but a bottle of 100 is overkill. Carry a 10-tablet foil pack instead.
- A CPR mask: Useful, but it takes up space. A simple face shield that fits on a keychain is sufficient for a car kit.
This checklist is not exhaustive, but it is the minimum that will handle both the common and the critical. The next section covers how to organize these items so you can access them in seconds.
Basic Car + Home First Aid Kit: A Ready-Made Option
Sourcing every item individually costs time and often more money. The Basic Car + Home First Aid Kit from RestockYourKit.com is ready-built and filled with supplies that handle the most common injuries. At $19.99, it covers the wound care basics layer completely and is sized for 6-8 people. Paired with a $15 tourniquet and hemostatic gauze, it creates a solid two-layer system for less than $50.

First Aid Kit Expiration Dates: What You Need to Know
Medical supplies do not last forever, and the heat of a car accelerates their decline. Adhesive bandages lose their stickiness, antiseptic wipes dry out, and a tourniquet can crack and fail when you need it.
Most manufacturers print expiration dates on packaging, but a common mistake is ignoring them until the date passes. A practical approach is to check your kit every six months, ideally when you change your clocks for daylight saving time. Replace anything that shows wear, such as cracked packaging, dried-out ointment, or gloves that have become brittle. The National Safety Council) recommends regular inspection of emergency supplies to ensure they remain functional.
How to Organize a Car First Aid Kit for Quick Access
Organization separates a useful kit from a box of scattered supplies. When blood is involved, you will not have time to dig through loose bandages. Use a bag with clear compartments or labeled pouches.
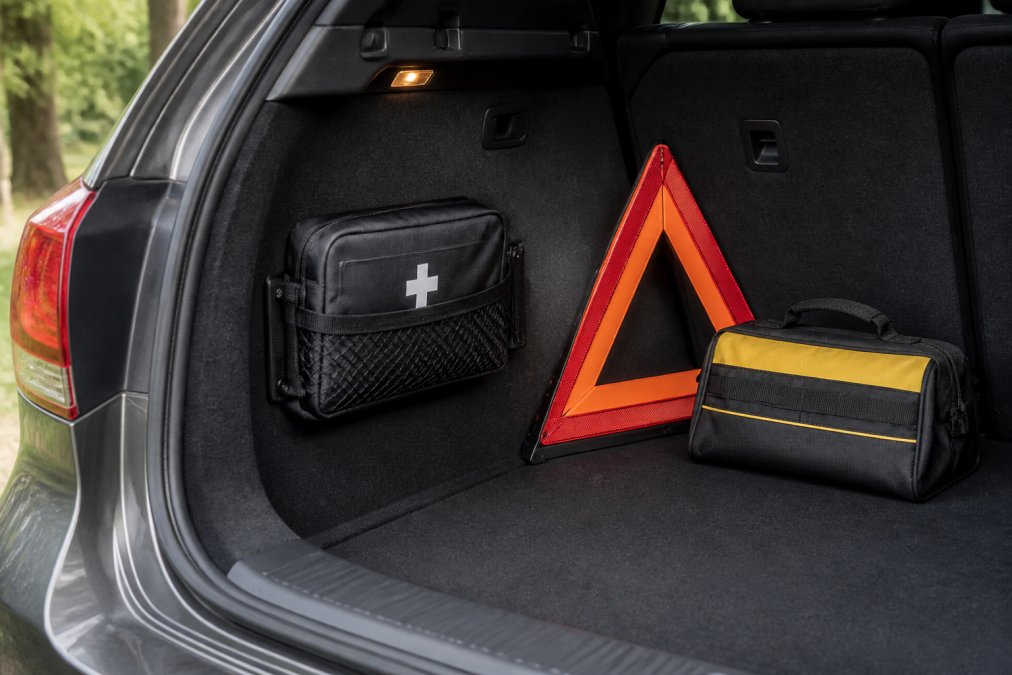
The Vehicle Environment Is the Real Organizing Challenge
A car's interior temperature can swing from below freezing to over 140°F in a single day. This heat physically changes how your kit behaves: adhesive bandages fuse to their wrappers, gauze pads become brittle, and plastic packaging cracks. The solution is climate-aware compartmentalization.
Choose a Bag That Survives Heat and Cold
Not all first aid bags are equal. Zippers fail when sand or grit gets into the tracks, so choose a bag with a roll-top or buckle closure. Ballistic nylon (840 denier or higher) resists UV degradation better than standard polyester. Avoid vinyl or PVC bags, they become brittle in cold and sticky in heat.
The Three-Zone System
Instead of one flat bag, use a three-zone system that matches how you will respond:
Zone 1: The Immediate-Access Pouch (mounted or clipped near the driver's seat)
This is a small pouch, roughly 6 × 4 inches, containing only the items you need in the first 30 seconds of a response: one pair of nitrile gloves, one trauma shears, one pressure dressing, and one tourniquet. It mounts on the seatbelt stalk, the side of the center console, or the back of the front seat, not in the trunk. If you are the one injured, you cannot reach the trunk. pack a bugout bag.
Zone 2: The Main Kit (in the trunk, secured)
This is the full checklist from the previous section. It lives in a dedicated bag strapped to the side of the trunk or secured with a cargo net. A loose bag becomes a projectile in a collision.
Zone 3: The Roadside Integration Pouch (attached to the main kit)
This is a clear, labeled pouch containing the non-medical items you need for scene safety: a reflective vest, a flashlight, and a whistle. It attaches to the outside of the main kit so you can grab it without opening the medical compartment.
Temperature Mitigation: Where to Store the Kit
The single biggest mistake is storing a kit in the trunk during summer. The trunk has no airflow and absorbs radiant heat from the rear window and exhaust system. Sustained temperatures above 130°F destroy adhesive integrity and cause liquid items to expand and leak.
Better options, in order of preference:
- Under the front seat: The coolest storage location. It is shaded from direct sun and benefits from cabin airflow when the AC is running. Use a low-profile bag that fits without obstructing the seat rails.
- In the cabin, in a shaded footwell: The rear footwell behind the driver's seat is a reasonable compromise, cooler than the trunk and accessible from the back seat.
- In a dedicated trunk organizer with insulation: If the trunk is your only option, place the kit inside an insulated cooler bag. This adds a thermal buffer that slows temperature swings and extends the lifespan of adhesives and liquids by several months.
The Deployment Sequence: Practice the Grab
Organization is also about the order in which you access items. In a real emergency, you will default to whatever you have practiced. Run this sequence once a season: put on the reflective vest from Zone 3, grab the Zone 1 pouch from its mount, exit the vehicle and assess scene safety, deploy the warning triangle or flares, return to the injured person with the Zone 1 pouch, and only if the injury is beyond Zone 1's capacity, retrieve the main kit from the trunk. This takes less than 60 seconds to practice.
The Labeling System That Works
Use a label maker with thermal-transfer tape (not inkjet labels, which run when wet). Write the contents and expiration date on each pouch. Color-code by severity: red for trauma, yellow for wound care, green for medications. Color is processed faster than text in low light.
The Weekender First Aid Bag from RestockYourKit.com is built for this exact purpose. Made of durable Oxford nylon, it is compact yet organized, keeping supplies visible and protected. At $19.99, it converts loose supplies into a structured kit that fits under a seat. Pair it with a small MOLLE-style pouch for Zone 1 for a complete three-zone system under $40.

Integrating Your Kit with Roadside Safety Gear
Your medical kit does not work in isolation. If you are treating an injury after a collision, the first priority is preventing a second accident. Your medical gear must work alongside your roadside safety equipment: reflective triangles, flares, a high-visibility vest, and a flashlight.
Store both systems in the same zone of your vehicle so you can deploy them together. When you pull over to assist, you put on the vest, set up the triangle, and grab the medical kit in one motion. Keeping these items separate puts everyone at risk.
Consider a small checklist for the order of operations: assess scene safety first, activate warning devices, then approach the injured person. The American Red Cross) emphasizes that scene safety is the first step in any response. Your car kit should reflect this by being stored with, not separate from, your roadside gear.
Legal Liability and Training for Rendering Aid
Many drivers hesitate to help because they fear legal consequences. Good Samaritan laws protect individuals who voluntarily render aid in an emergency, as long as they act in good faith and within the scope of their training. You cannot be held liable for unintended outcomes unless you act with gross negligence.
The scope of your training is the key phrase. If you have not been trained to use a tourniquet, applying one incorrectly could cause harm. This is why training matters as much as the gear itself. A basic first aid and CPR course, widely available through organizations like the American Red Cross, teaches you when and how to use your supplies. The Occupational Safety and Health Administration) sets standards for workplace first aid that translate well to personal preparedness, including the expectation that responders are trained to use the equipment provided.
Your Next Step: Build or Upgrade Your Car Kit
Start with a solid base of wound care, add a compact trauma layer for severe bleeding, and store it all in an organized bag next to your reflective gear. Check expiration dates twice a year. The fastest path to a finished kit is a ready-made foundation. RestockYourKit.com offers the Basic Car + Home First Aid Kit for everyday injuries and the Individual First Aid Kit for a more compact, portable option at $41.99. Both are custom-built with fresh, professional-grade supplies, and you can add individual trauma items like tourniquets and hemostatic gauze at near-wholesale prices. Get started with RestockYourKit.com and build a first aid kit that actually works when your car becomes the emergency room.

Frequently Asked Questions
Are you legally required to have a first aid kit in your car?
No federal law mandates a first aid kit for private passenger vehicles. However, commercial vehicles are regulated by OSHA, which requires employers to ensure medical supplies are readily available. For everyday drivers, it is not a legal requirement, but individual first aid supplies for cars are a practical necessity. A basic kit helps you manage minor injuries on the road and provides critical support in an emergency while waiting for professional help.
How often should I check and restock my car first aid supplies?
Check your kit every three to six months. Heat and cold accelerate the degradation of items like adhesive bandages, medications, and antiseptics, so pay close attention to first aid kit expiration dates. Make it a habit to inspect the kit when you change your clocks for daylight saving time. Replace any used or expired items immediately so the kit is always ready.
What is the difference between a basic first aid kit and a trauma kit for cars?
A basic first aid kit handles minor injuries: cuts, scrapes, headaches, and small burns. A trauma kit contains life-saving interventions for severe bleeding, such as a tourniquet and hemostatic gauze. A trauma response system is critical for highway accidents where severe bleeding is possible. For most drivers, a comprehensive basic kit is the right starting point, with a separate trauma kit if you travel long distances or in remote areas.
Where is the best place to store a first aid kit in a vehicle?
Store your kit somewhere you can reach quickly but where it won't become a projectile in a crash. The glove box works for a small pouch, but a larger kit fits well under a seat or in a secured spot in the trunk. Extreme temperatures degrade supplies, so avoid leaving it in direct sunlight. If you keep it in the trunk, make sure you can access it even if the car's electronics fail.