

Essential Tick Removal Kit Items: A 2026 Guide
Table of Contents
- Why You Need Essential Tick Removal Kit Items
- Best Tick Removal Tools for Humans
- How to Remove a Tick Safely: Step-by-Step Process
- Tick Identification and Preservation
- Tick Bite Symptoms to Watch For
- Building Your Complete Tick Removal Kit
- When to Seek Medical Attention
- Conclusion
- Frequently Asked Questions
Last Updated: September 1, 2026
Why You Need Essential Tick Removal Kit Items
Ticks are nearly everywhere nowadays. If you go hunting, fishing, camping, hiking, play outdoor sports, or even garden, you could easily come in contact with ticks. The risk isn't just discomfort, it's disease. Lyme disease, the fastest growing disease in the country according to public health data, spreads through tick bites (the CDC). Having essential tick removal kit items on hand means the difference between a quick, safe removal and a potential health crisis.
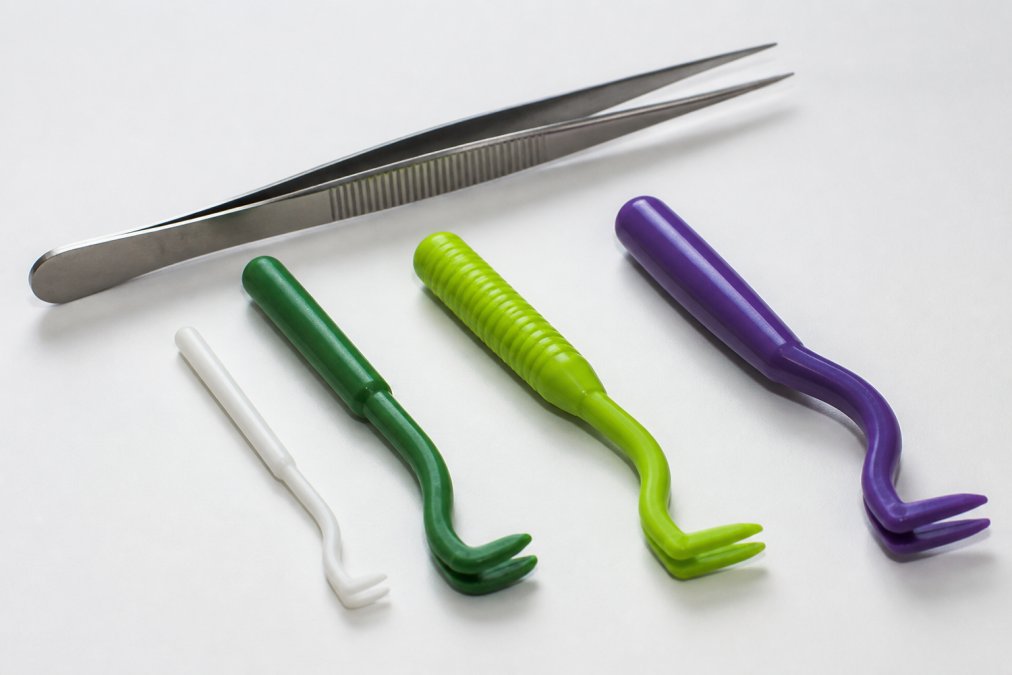
Most people don't think about ticks until they find one. By then, panic sets in. They reach for tweezers that are too blunt, pull at the wrong angle, or worse, squeeze the tick and force pathogens into the wound. A proper tick removal kit prevents these mistakes. It gives you the right tools, the right knowledge, and the confidence to act fast when it matters.

At RestockYourKit.com, we provide high-quality gear and hard-to-find medications at near-wholesale prices, ensuring you are prepared for everything from cold and flu season to specialized animal care. This guide covers exactly what belongs in a tick removal kit, how to use each item, and what to do after a tick bite.
Best Tick Removal Tools for Humans
The tools you choose determine whether tick removal is safe or risky. Fine-tipped tweezers and specialized removal devices each have their place. Understanding the differences helps you pick what works best for your situation.
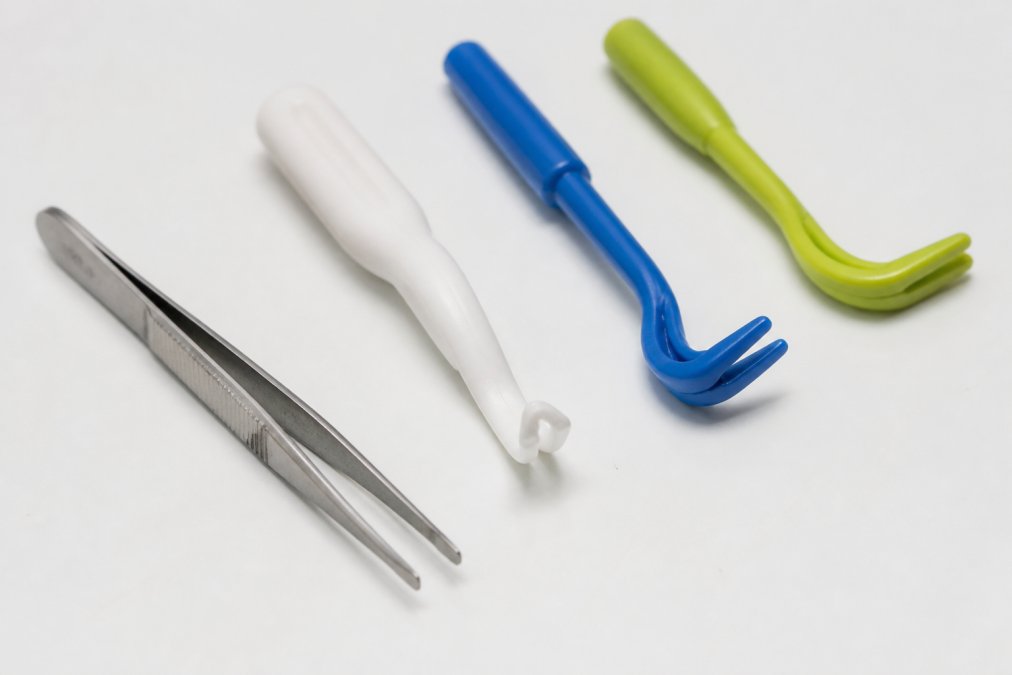
Fine-Tipped Tweezers and Precision Tools
Fine-tipped tweezers are the most accessible tool for tick removal. They allow you to grasp the tick's mouthparts, the part embedded in skin, without crushing the body. Stainless steel tweezers are essential because they resist corrosion and can be sterilized repeatedly.
The key is precision. Blunt tweezers slip off. Tweezers with rough edges crush the tick. You need tweezers with smooth, tapered tips that come to a fine point. When you grasp a tick, you're targeting the mouthparts, not the body. A proper grip means holding the tick as close to the skin as possible, then pulling straight up with steady, even pressure.
Common mistakes happen when people use whatever tweezers are in the bathroom drawer. Those tweezers are usually too wide, too dull, or too short. They force people to pull at angles, which increases the chance of leaving mouthparts behind or rupturing the tick. The right tweezers cost just a few dollars but prevent infection and incomplete removal.
Tick Twister and V-Shaped Removal Devices
Tick Twisters and v-shaped removal tools offer an alternative that many people prefer. These devices work by creating use under the tick's body without requiring a crushing grip. A Tick Twister, for example, slides under the tick, then rotates to lift it free.
The advantage is simple: less pressure on the tick means less risk of rupturing it. These tools are especially useful for people with arthritis, weak grip strength, or shaky hands. They're also faster, experienced users can remove a tick in seconds.
V-shaped tools work differently. You slide the notched end around the tick, then pull upward. The shape distributes pressure more evenly than tweezers, reducing the chance of squeezing the tick. Many outdoor enthusiasts prefer these because they're pocket-sized and nearly impossible to lose. RestockYourKit.com offers the Tick Twister as a 2-pack for just $5.99, making it affordable to keep multiple devices in different kits.
The choice between tweezers and specialized tools comes down to comfort and confidence. If you're confident with tweezers, they work fine. If you prefer a tool designed specifically for ticks, a Tick Twister removes doubt from the process.
How to Remove a Tick Safely: Step-by-Step Process
Safe tick removal follows a precise sequence. Rushing any step increases the risk of infection or incomplete removal. The process takes just a few minutes but requires focus and the right supplies.
Preparation and Tool Selection
Start by gathering your supplies before you touch the tick. You'll need your removal tool, tweezers or a Tick Twister, rubbing alcohol, antiseptic, and a container to preserve the tick for testing if needed. Preparing first prevents fumbling around while a tick is embedded in your skin.
Inspect the tick to identify it if possible. Is it a nymph (tiny, pinhead-sized) or an adult (larger, visible from across the room)? Nymphs are harder to see but easier to remove because they haven't fed as long. Adults are engorged and more visible but may have been attached longer. This information matters for monitoring symptoms later.
Choose your tool based on the tick's size and your comfort level. Nymphs work better with tweezers because they're so small that specialized tools can miss them. Adults work with either tweezers or a Tick Twister. If you're uncertain, tweezers are always the safer choice.
Safe Removal Technique
Grasp the tick as close to the skin as possible. This targets the mouthparts, which are the part that transmits disease. Pull straight up with steady, even pressure. Don't twist, jerk, or squeeze. The removal should take 10-30 seconds of constant upward pressure. If the tick resists, you may be pulling at an angle, adjust and try again.
Never crush the tick. Never apply petroleum jelly, nail polish, or heat to make it back out. These old remedies either don't work or make things worse by stressing the tick and forcing pathogens into the wound. The only method that works is direct removal. pet owner supplies.
Once the tick is free, place it in a container with rubbing alcohol or seal it in a plastic bag. Don't flush it down the toilet, ticks can survive water. If you suspect the tick was attached for more than 24 hours, preserve it for testing. Many labs can identify the tick species and test for pathogens like Lyme disease bacteria.
Sterilization and Aftercare
Clean the bite site with rubbing alcohol or an antiseptic. Wash your hands with soap and water. Apply antibiotic ointment to the bite if the skin is broken. Cover it with a bandage if it's in a location where clothing will rub against it.
Monitor the bite site for signs of infection over the next two weeks. Redness, warmth, swelling, or pus means infection, see a doctor. Some people develop a circular rash around the bite site. This doesn't always mean Lyme disease, but it warrants medical evaluation. The sooner you catch infection, the easier it is to treat.
Tick Identification and Preservation
Identifying the tick species tells you what diseases it might carry. The three most common ticks in the country are the deer tick (blacklegged tick), American dog tick, and Lone Star tick. Each carries different pathogens and poses different health risks.
Deer ticks are tiny, nymphs are pinhead-sized, adults are about the size of a sesame seed. They carry Lyme disease bacteria and other pathogens. American dog ticks are larger and brown. Lone Star ticks are also brown but have a distinctive white spot on their back.
Tick identification cards are invaluable. RestockYourKit.com offers identification cards for just $0.25 each. These business card-sized cards show all three common species with sizing guides for larvae, nymphs, and adults. Laminate them and keep them in your first aid kit or wallet. When you find a tick, you can identify it immediately.

Preserving the tick is important if you suspect it was attached for more than 24 hours. Place it in a sealed plastic bag with a damp paper towel, or preserve it in rubbing alcohol. Include the date of removal and the location where you found the tick. Many diagnostic labs can test preserved ticks for pathogens. This information helps your doctor make treatment decisions if you develop symptoms.
Tick Bite Symptoms to Watch For
Not every tick bite causes disease. But knowing what symptoms to watch for means you catch infection early, when treatment is most effective.
Immediate Symptoms and Skin Reactions
The bite site may itch, redden, or swell immediately after removal. This is normal inflammation and usually resolves within a few days. Apply hydrocortisone cream if itching is severe. Avoid scratching, which introduces bacteria and increases infection risk.
Some people develop skin irritation around the bite. This can look like a small bump, a rash, or localized redness. Again, this is usually just inflammation and not a sign of disease. The key is monitoring over time. If redness spreads, intensifies, or appears days after removal, that's a different story.
Tick-Borne Disease Warning Signs
Lyme disease symptoms typically appear 3-30 days after infection (the CDC). The most recognizable sign is a circular rash that expands outward from the bite site, often called a "bull's-eye" rash. But not everyone develops this rash. Some people experience fever, chills, fatigue, muscle aches, or joint pain instead.
Other tick-borne diseases have different symptoms. Rocky Mountain spotted fever causes fever and a rash that starts on wrists and ankles. Babesiosis causes fever, fatigue, and muscle aches similar to the flu. Anaplasmosis causes headache, fever, and muscle pain.
If you develop any of these symptoms within a few weeks of a tick bite, see a doctor immediately. Tell them about the tick bite and when it occurred. Early antibiotic treatment for Lyme disease is highly effective (peer-reviewed research). Waiting makes treatment harder.
Building Your Complete Tick Removal Kit
A complete kit combines removal tools with identification and aftercare supplies. The right combination ensures you're prepared whether you find a tick on yourself, a family member, or a pet.
Essential Supplies Checklist
| Item | Purpose | Quantity |
|---|---|---|
| Fine-tipped tweezers or Tick Twister | Remove the tick safely | 1-2 |
| Rubbing alcohol (70% isopropyl) | Sterilize tools and preserve tick | 1 small bottle |
| Antiseptic or antibiotic ointment | Prevent infection at bite site | 1 tube |
| Tick identification card | Identify tick species | 1 |
| Sealed container or plastic bag | Preserve tick for testing | 2-3 |
| Sterile gauze or bandages | Cover bite if needed | Small pack |
| Gloves (optional) | Protect hands during removal | 1 pair |
| Tick safety brochure | Reference for symptoms and next steps | 1 |
RestockYourKit.com's Tick Safety Kit includes most of these items for $19.99. It combines a Tick Twister, alcohol pads, an identification card, and a preservation container in a compact package. For families or outdoor groups, buying the kit is more cost-effective than assembling supplies separately.

Kit Maintenance and Expiration
Tick removal kits require maintenance. Rubbing alcohol evaporates over time, so check your kit every 6-12 months. Replace alcohol if the bottle has been open or if the level has dropped. Tweezers and removal tools don't expire, but they should be cleaned and dried after use.
Check identification cards for damage. Laminated cards last longer than paper ones. Replace them if they become unreadable. Antiseptic ointment and alcohol pads have expiration dates, replace these annually or as needed.
Keep your kit in a cool, dry place. Heat and humidity degrade supplies. A small plastic container with a tight seal works well. Label it clearly so family members know where to find it when needed.
When to Seek Medical Attention
Not every tick bite requires a doctor visit. But certain situations demand professional evaluation.
See a doctor immediately if the tick was embedded for more than 24 hours and you cannot remove it completely. If mouthparts remain in the skin, infection risk increases. A doctor can remove remaining parts and prescribe antibiotics if needed.
Seek medical attention if you develop symptoms within 3-30 days of a tick bite: fever, rash, joint pain, muscle aches, or fatigue. Bring the preserved tick if you have it, it helps your doctor identify what pathogen you might have been exposed to.
If the bite site shows signs of infection, increasing redness, warmth, swelling, or pus, see a doctor. Skin infections from tick bites respond well to antibiotics if caught early.
If you're pregnant or immunocompromised, contact your doctor after any tick bite, even if you don't have symptoms. These populations face higher risks from tick-borne diseases.
Conclusion
A tick removal kit is one of those things you hope you never need but absolutely must have. The difference between a safe removal and a risky one comes down to having the right tools and knowing how to use them. Fine-tipped tweezers or a Tick Twister, rubbing alcohol, an identification card, and a preservation container cost less than $20 combined, a small investment compared to the cost of treating Lyme disease or other tick-borne infections.
RestockYourKit.com is your premier destination for custom-built first aid kits and essential medical supplies, catering to individuals, crews, and backyard poultry enthusiasts alike. Our Tick Safety Kit combines precision removal tools, identification resources, and aftercare supplies in one compact package. Start with a kit, keep it maintained, and you'll be ready whenever tick season arrives.
Frequently Asked Questions
What should be in a tick removal kit?
A complete tick removal kit includes fine-tipped tweezers or a tick removal tool, rubbing alcohol or antiseptic solution, sterile gauze pads, a tick identification card to recognize different species, and a small container for tick preservation if you need post-removal testing. The Tick Safety Kit from RestockYourKit.com includes many of these essentials in one compact package for $19.99, making it convenient for outdoor activities.
What is the most effective tool for removing a tick?
Specialized tick removal tools like the Tick Twister ($5.99) are highly effective because they grip the tick's body without crushing it, which reduces pathogen transmission risk. Fine-tipped tweezers work well for small ticks and nymphs, but a dedicated tick removal device provides better precision and control. The key is using the right tool for the tick's size and avoiding methods that squeeze the mouthparts.
How do you know if a tick bite has become infected?
Watch for increasing redness, warmth, swelling, or pus at the bite site beyond the first few days. Signs of secondary infection include red streaking from the bite area, fever, or lymph node swelling. If you notice these symptoms or develop a rash (especially a bull's-eye pattern associated with Lyme disease), contact a medical professional promptly. Keep the bite site clean and avoid scratching to prevent infection.
Should I preserve the tick after removal?
Preserving the tick in rubbing alcohol allows for post-removal testing if you develop symptoms of tick-borne illness. This is especially important if the tick was attached for more than 24 hours or if you're in an area with high Lyme disease risk. Store the tick in a sealed container with the date and location noted. Your doctor can send it for testing if needed, which helps confirm diagnosis and guide treatment decisions.